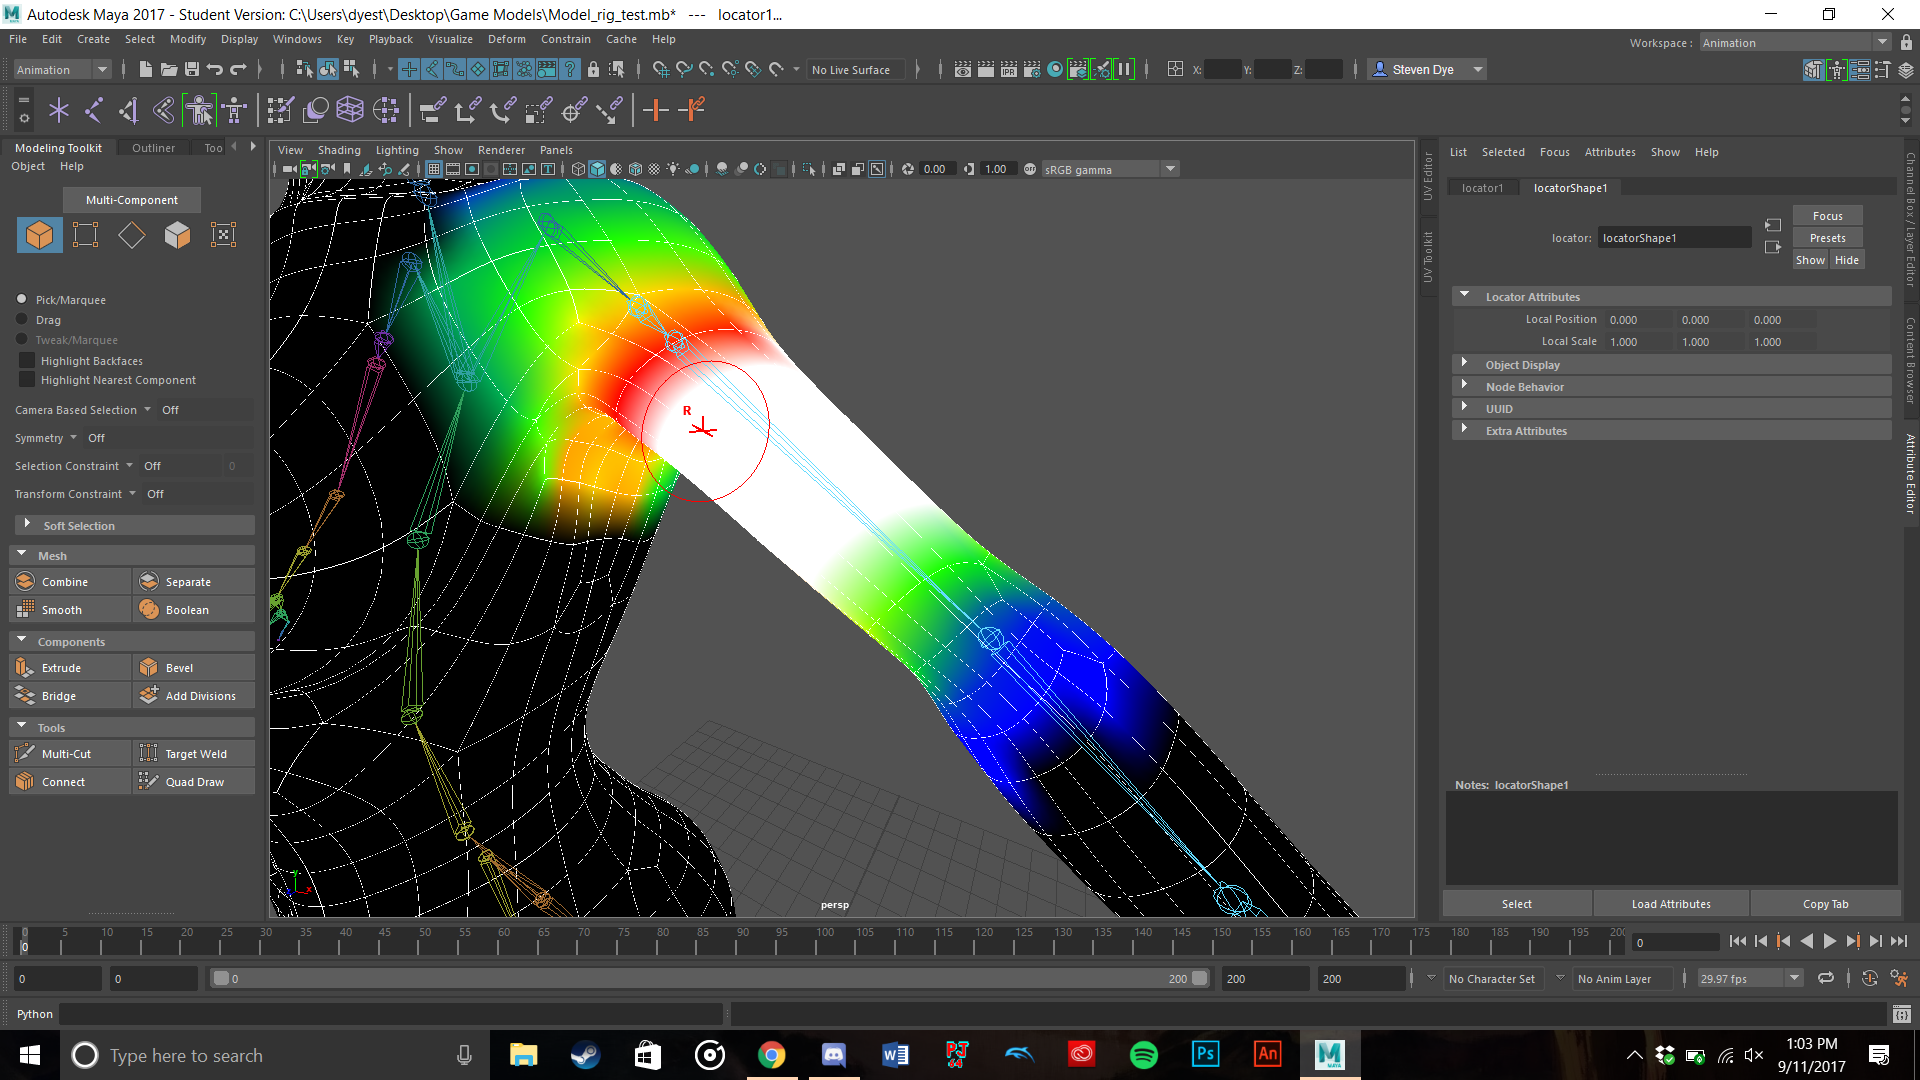
-Right clicking on joint and using a marking menu to select the paint weight option is typically faster than trying to find the same joint in the paint weight joint list. The colour shows where the skin weight of each joint influences.

Solved Painting Skin Weight Tips Autodesk Community Maya
In Maya you have the option to export skin weights and re-import them as if nothing ever happened.
. Know what your. Go to the Paint Skin Weights Tool. Maya 20223 is available for Windows 10 RHELCentOS 76-79 or 82 Linux and macOS 1013.
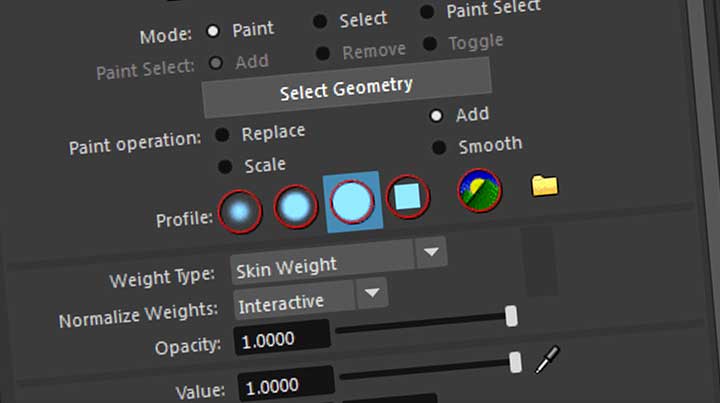
Simplifying geometries with thickness and copying the weights. Gio Coutinho Rooster Teeths Rigging Artist shows you how to create better rigs with simple skinning tips in MayaSee more Rooster Teeth x Maya Tutorials. Using the Smooth paint mode paint over the edges of the white area.
Use node type filtering to enhance Attribute Editor performance. A typical workflow in painting weights the key task in skinning is selecting the geometry switch to paint skin weights tool select the corresponding joint in the weight manager and then begin painting. Lock down everything youre not working on.
Use the Marking Menu. Do a rough block-out for the major sections upper torso lower torso upper leg lower leg etc test it out then. Click on either joint.
Slow in Slow out. This one comes in very handy when we are dealing with. Most likely youll start to see deformation issues and joints that arent having the right influence on your model.
This creates some falloff in your weight values so that mesh that is very close to the Root joint has an weight of 1 but mesh farther away from the root joint might have an influence of 05. Shop by department purchase cars fashion apparel collectibles sporting goods cameras baby items and. But i am finding it impossible.
Maya Weight Painting Tips Texturing Stylish Cartoon Character In Maya Photoshop Video Tutorial Cg Elves. If youre a 2D artist making the move into 3D you should check out this sketchpad for Maya Blue Pencil which provides 2D drawing to Mayas 3D viewport. The Principles of Animation as listed in The Illusion of Life.
I have been for the last few months trying to do weight painting for a skirt. I like to set the strength of the Brush to Full. See more ideas about maya character rigging rigs.
Some Tips For Painting Skin Weights In Maya Bindpose While painting with a 10 weight means that the bone will effect 100 of the vertices painted and will be shown in a red color on the mesh. Key a range-of-motion cycle on the skeleton to scrub through while youre working. In Tool Settings window the Influences list is displayed with the colours assigned to the joints.
Keeping normalization on interactive means that Maya will always balance the weights between 0-1 while painting but you want to make sure the skin cluster is set to neighbors so that the balancing doesnt spread weights out across the entire set of influences instead only looking at the surrounding points and their influences to decide how to spread out the weights. A week or more ago i learned how to rigg and weight paint in. Substitute can oddly disperse weights between joints.
The problem comes when you. There are two types of FORCE internal and external. To rotate and move use the controller bones and to adjust the weight paint select the deforming bones.
Alternatively right-click and select Skin Weights Tool. Ive looked up several tutorials for painting skin weights but Im still missing something. The software is rental-only.
Profile a scene to improve performance. In many countries artists earning under 100000year and working on projects valued at under 100000year qualify for Maya Indie subscriptions now priced at 280year. Heres my little collection of tips.
Some tips for painting skin weights in Maya Contents. Using simple proxy geometry to achieve very smooth weights interpolation. Get the most out of Maya.
This will allow you to very easily spot the problem areas and you can go in and fix the skinning issues by painting the weights. I first tried it in maya for a few months but could not get the gap between both legs to keep from looking blocky like the system skirt looks when you walk in it. Painting Weights - Tips-Avoid using Substitute stick with ReplaceAddSmooth on the Paint Weight Brush options.
Painting skin weight tips I have been trying my hand at rigging this female model for a couple weeks now but I do not seem to be getting too far with the process. So with that out of the way let us get on with it. There is an Export Import Weight Maps under the Skin Menu AND there is export.
Increase performance with the Evaluation Manager. I am not sure what to do anymore. Subscriptions cost 215month or 1700year.
The thing is there are actually two ways that you can do this. To set the skin weight with the body selected Skin Paint Skin Weights. Wait force and weight dont exist in animation there can only be a visual implication.
Set Skin Weight. This means youre focusing on the areas that need it most and not the areas that dont. Pose to pose animation.
Unlock the Root and the LHip. Optimize the Maya Hotbox and marking menus on Linux. May 30 2018 - Explore VFXskillss board Painting Weights in Maya on Pinterest.
The useful plugin features a grease pencil tool.

Painting Skin Weights In Maya Youtube
Solved Painting Skin Weight Tips Autodesk Community Maya
Blue Zoo Rigger Shares 11 Tips For Painting Weights In Maya Lesterbanks

Rigging For Beginners Painting Weights In Maya Youtube

Maya 2017 Weight Painting Tutorial Youtube

Maya Paint Skin Weights Youtube

Some Tips For Painting Skin Weights In Maya Bindpose

Paint Skin Weights Maya Autodesk Knowledge Network
0 comments
Post a Comment